 Pin it
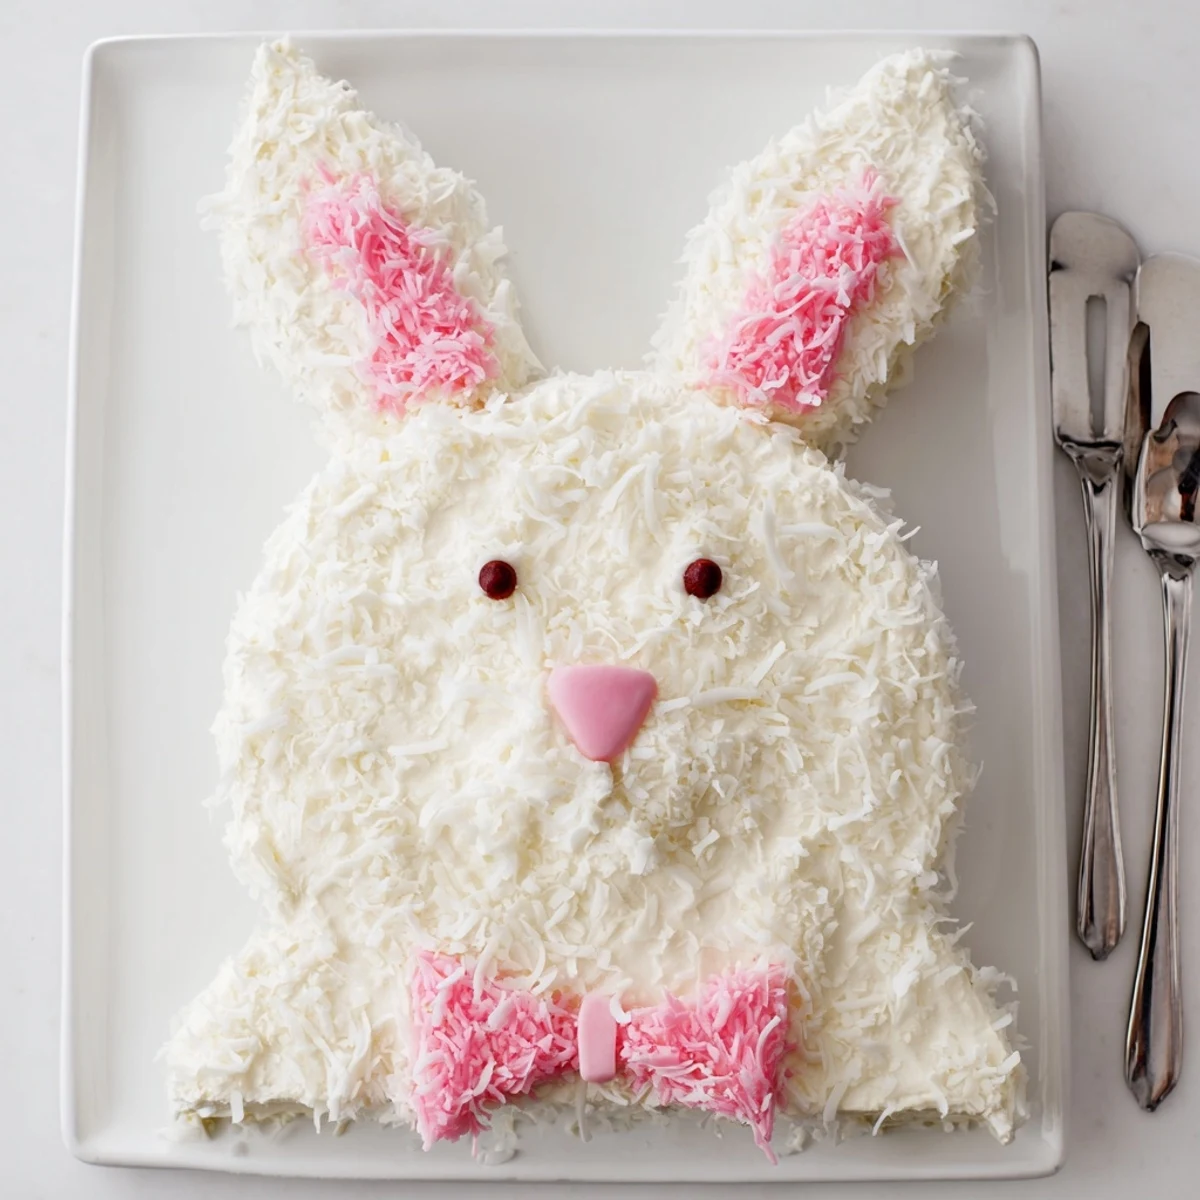
 This delightful bunny-shaped creation features moist vanilla cake layers coated in creamy buttercream and covered in shredded coconut for a fluffy fur effect. The playful design includes two round cakes—one left whole for the face, the other cut into ovals for ears and a center bow tie. Pink-tinted coconut adds adorable inner ear details, while candies bring the facial features to life. Ready in just one hour, this festive dessert serves twelve and stores beautifully for days.
My auntie brought this bunny cake to our first Easter after I moved out on my own, and I honestly teared up a little seeing that fluffy coconut face staring back at me from her kitchen counter. It wasnt just dessert, it was her way of bringing family tradition into my tiny apartment kitchen. The coconut got everywhere that afternoon, and I think we were still finding pink specks in her pantry weeks later.
Last spring my niece helped me assemble one, and she took the ear placement so seriously you would have thought she was performing surgery. We may have eaten more jelly beans than we actually attached to the bunny face, but nobody complained about that.
Ingredients
- All-purpose flour (2¼ cups): The foundation that holds everything together, so measure it by weight if you can for consistent results
- Baking powder and baking soda: Both work together to give your cake that perfect tender rise
- Salt (½ tsp): Just enough to balance the sweetness and bring out the vanilla flavor
- Granulated sugar (1 cup): Cream this properly with butter for the lightest, fluffiest crumb
- Unsalted butter (½ cup for cake, 1 cup for frosting): Soften it properly, not melted in the microwave, for the best texture
- Large eggs (3): Room temperature eggs blend better into your batter and create a more even cake
- Whole milk (1 cup for cake, 2-3 tbsp for frosting): Adds moisture and richness, though I have used buttermilk in a pinch
- Vanilla extract (2 tsp for cake, 1 tsp for frosting): Do not skimp here, good vanilla makes all the difference
- Powdered sugar (4 cups): Sift it first or your frosting will have lumps that no amount of beating can fix
- Shredded sweetened coconut (2 cups): This is what transforms your cake into an adorable fuzzy creature
- Pink food coloring: A tiny drop goes a long way for those sweet inner ears
- Jelly beans or mini candies: For the nose and eyes, though I have used chocolate chips in emergencies
- Pink and white fondant or marshmallows: To create those perky bunny ears that stand up properly
Instructions
- Preheat your oven like you mean it:
- Get that oven to 350°F and grease your two 8-inch round pans really thoroughly, I like to use butter and flour for insurance
- Whisk the dry stuff together:
- Combine the flour, baking powder, baking soda, and salt in a medium bowl so everything distributes evenly
- Cream butter and sugar until fluffy:
- Beat the butter and sugar together until they are pale and fluffy, then add those eggs one at a time
- Combine wet and dry gently:
- Add the vanilla, then alternate the flour mixture and milk, starting and ending with the flour and mixing just until combined
- Bake until perfectly done:
- Divide the batter between your pans and bake for 22-25 minutes, until a toothpick comes out clean with just a few moist crumbs
- Cool completely before decorating:
- Let the cakes rest in pans for 10 minutes, then turn them out onto wire racks to cool completely
- Make the frosting:
- Beat that butter until smooth, then gradually add the powdered sugar, vanilla, salt, and just enough milk to make it spreadable
- Cut the bunny shapes:
- Keep one cake round whole for the face, cut the second into two oval ears, and shape the remaining center into a bow tie
- Arrange your bunny:
- Place the face, ears, and bow tie on your serving board before frosting so you can adjust the positioning
- Add a crumb coat first:
- Spread a thin layer of frosting over everything and chill for 20 minutes to keep those coconut flakes clean
- Frost and add the fur:
- Cover the whole bunny with frosting and immediately press coconut all over, working in sections so it sticks well
- Color some coconut pink:
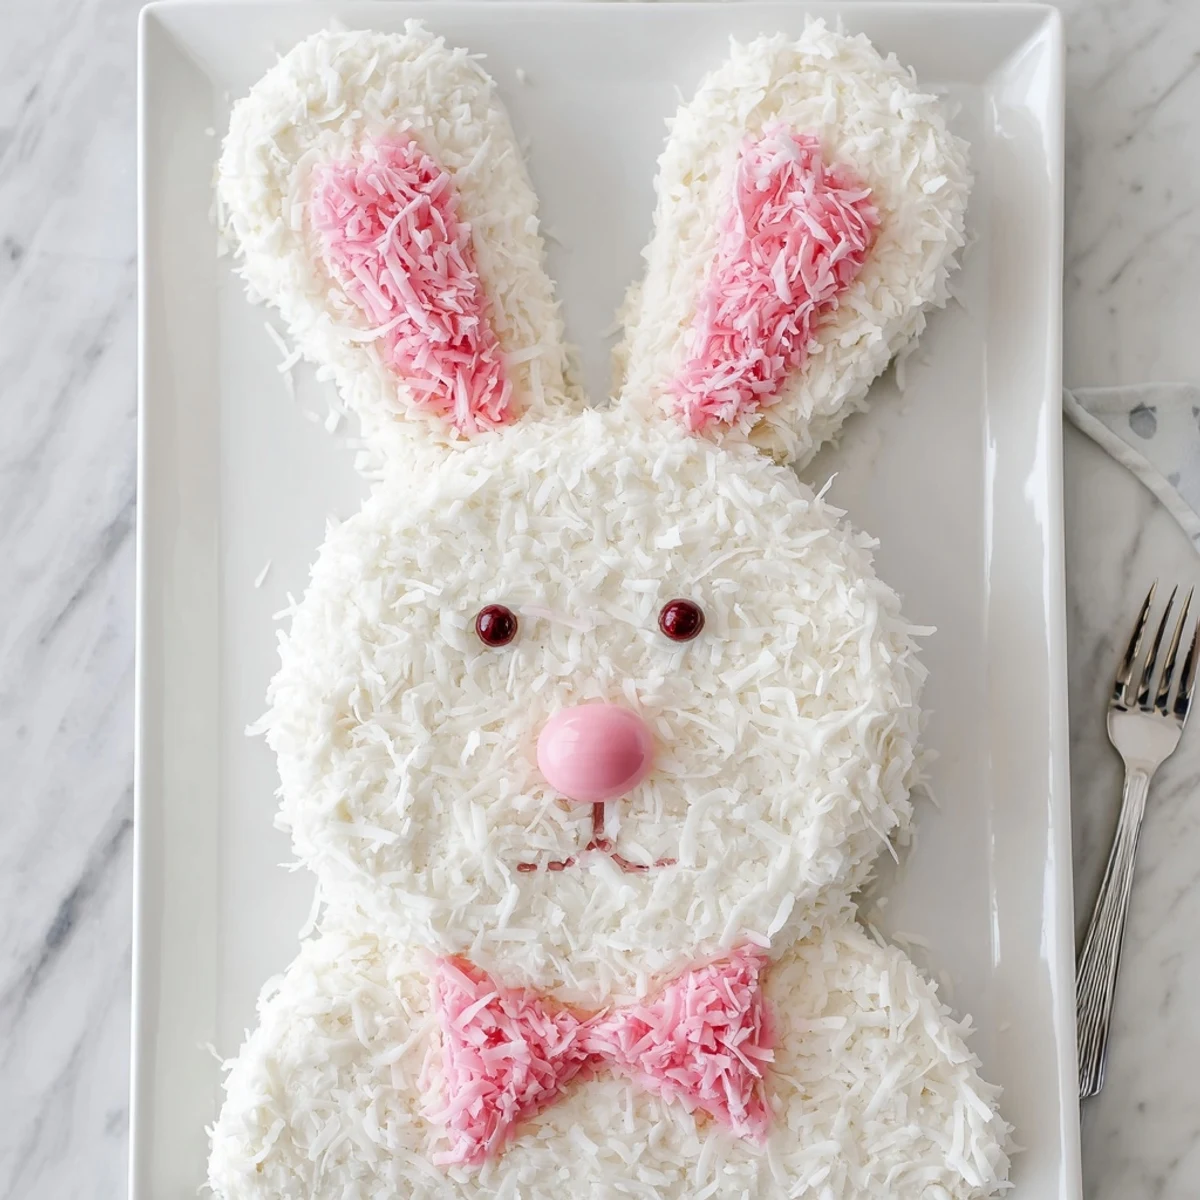
- Tint a small handful of coconut with pink food coloring and gently press it onto the inner ear sections
- Add the finishing touches:
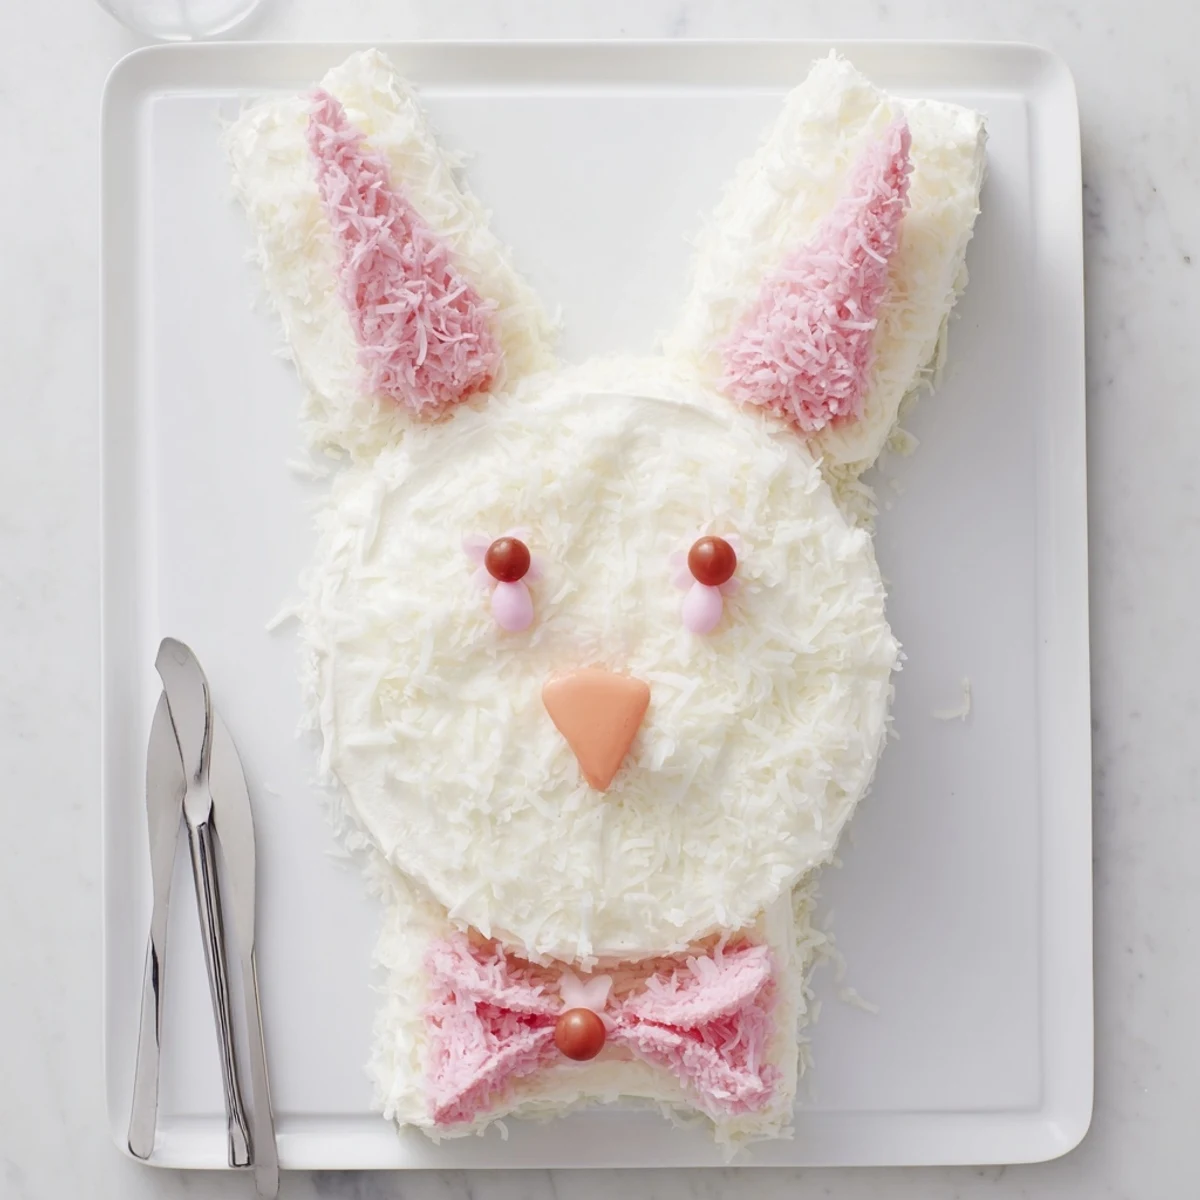
- Place fondant or marshmallow details for the ears, then add candies for the nose, eyes, and whiskers
 Pin it
 My daughter made one for her class spring party and came home so proud, explaining how she figured out the ear placement by herself while I just watched and handed her sprinkles. Sometimes these desserts become memories that stick longer than the actual sugar rush.
Getting That Shape Right
I use a piece of parchment paper to sketch out my ear and bow tie shapes first, then cut around it as a guide. The first time I freehanded it, one ear ended up noticeably larger than the other and my family did not let me live it down for years. Now I trace the outline on the cake surface with a toothpick before cutting into anything.
Frosting Without The Mess
That crumb coat step feels like extra work but it is absolutely what separates a homemade looking cake from something that could have come from a bakery. I learned this the hard way after attempting to skip it and ending up with coconut mixed into ugly streaks of cake crumbs through the white frosting.
Making It Your Own
Once you have the basic bunny shape down, you can get creative with different expressions and accessories. We have done everything from bow ties to little flower crowns, and the variations are part of what makes this recipe so fun to return to year after year.
- Chocolate cake works beautifully with this design if vanilla is not your thing
- Store bought frosting saves time when you are rushing toward a holiday deadline
- Licorice strips make surprisingly convincing whiskers if you have them on hand
 Pin it
 Hope your kitchen ends up as covered in coconut and joy as mine always does. Happy baking.
Recipe FAQs
- → How do I cut the cake into bunny shapes?
-
Keep one 8-inch round cake whole for the bunny face. Cut the second round into two equal oval shapes for ears, then trim the remaining center portion into a bow tie. Arrange all pieces on a large serving tray before frosting.
- → Can I make this bunny cake ahead of time?
-
Yes! Bake the cake layers up to two days in advance and store wrapped at room temperature. The frosted cake keeps covered at room temperature for 2 days or refrigerated for up to 4 days. Add coconut and decorations just before serving for best texture.
- → What other cake flavors work well?
-
Chocolate, lemon, or strawberry cake pair beautifully with the coconut and buttercream. The coconut flavor particularly complements vanilla, chocolate, and carrot-based cakes. Choose a flavor that matches your spring celebration theme.
- → How do I get the coconut to stick properly?
-
Apply a generous layer of buttercream frosting, then gently press shredded coconut onto the surface while the frosting is still fresh. For the pink inner ears, tint a small amount of coconut with food coloring and press carefully onto the ear sections.
- → What alternatives work for decorations?
-
Swap fondant ears for large marshmallow slices cut into ear shapes. Use chocolate chips, raisins, or edible candy eyes instead of jelly beans. Licorice strips make perfect whiskers. Feel free to get creative with whatever festive candies you have on hand.
- → Can I freeze this bunny cake?
-
Freeze the unfrosted cake layers wrapped tightly for up to 3 months. Thaw overnight at room temperature before assembling. It's best to add fresh frosting and coconut after thawing for optimal texture and appearance.
