 Pin it
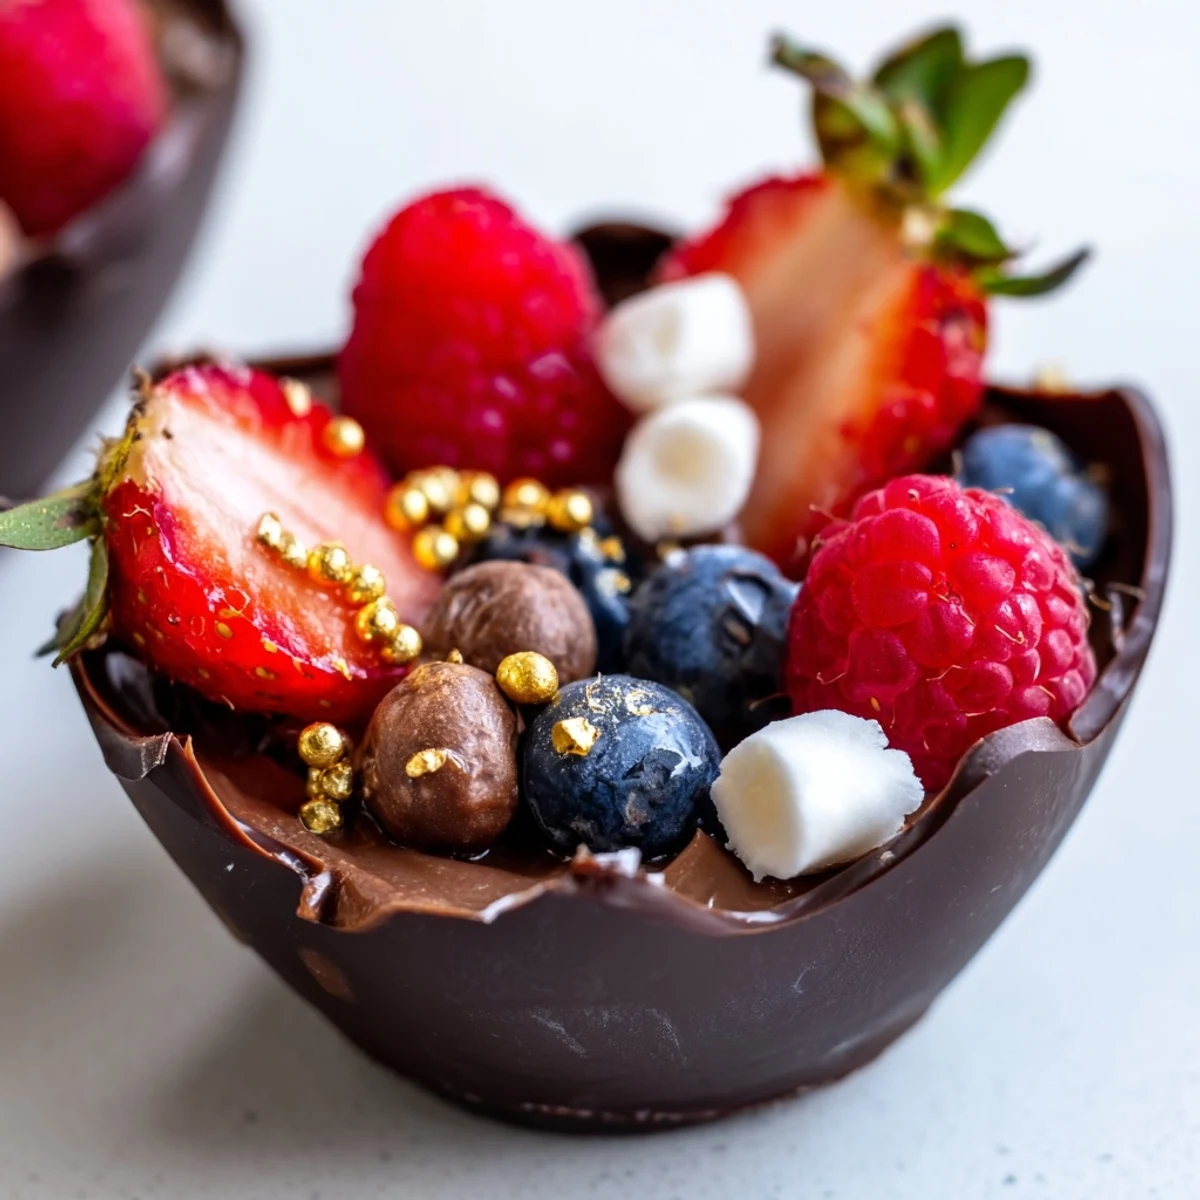
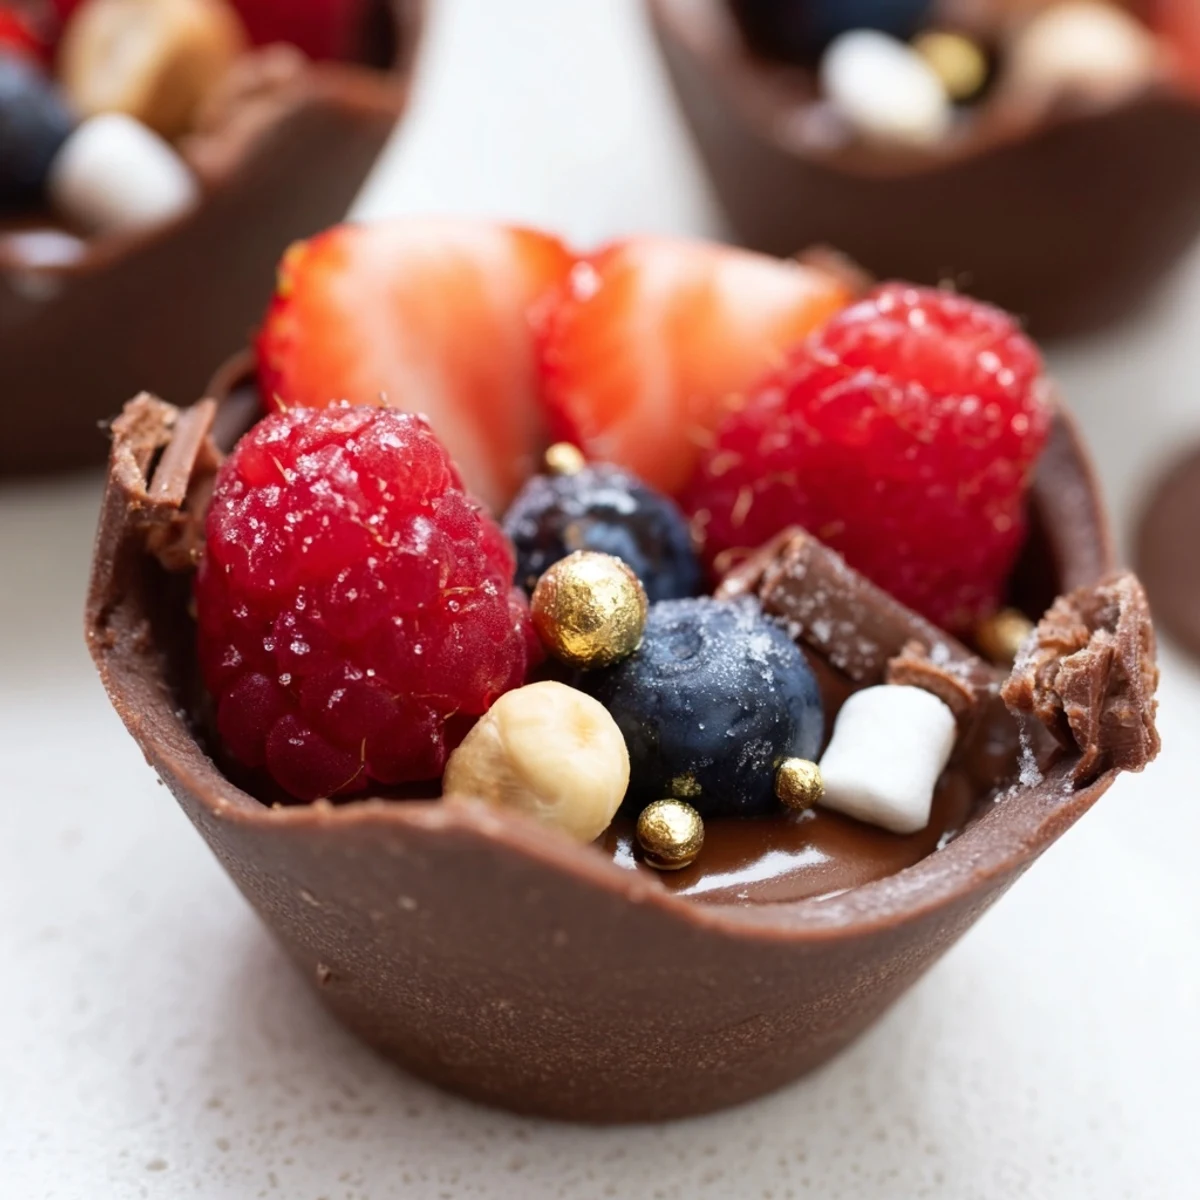
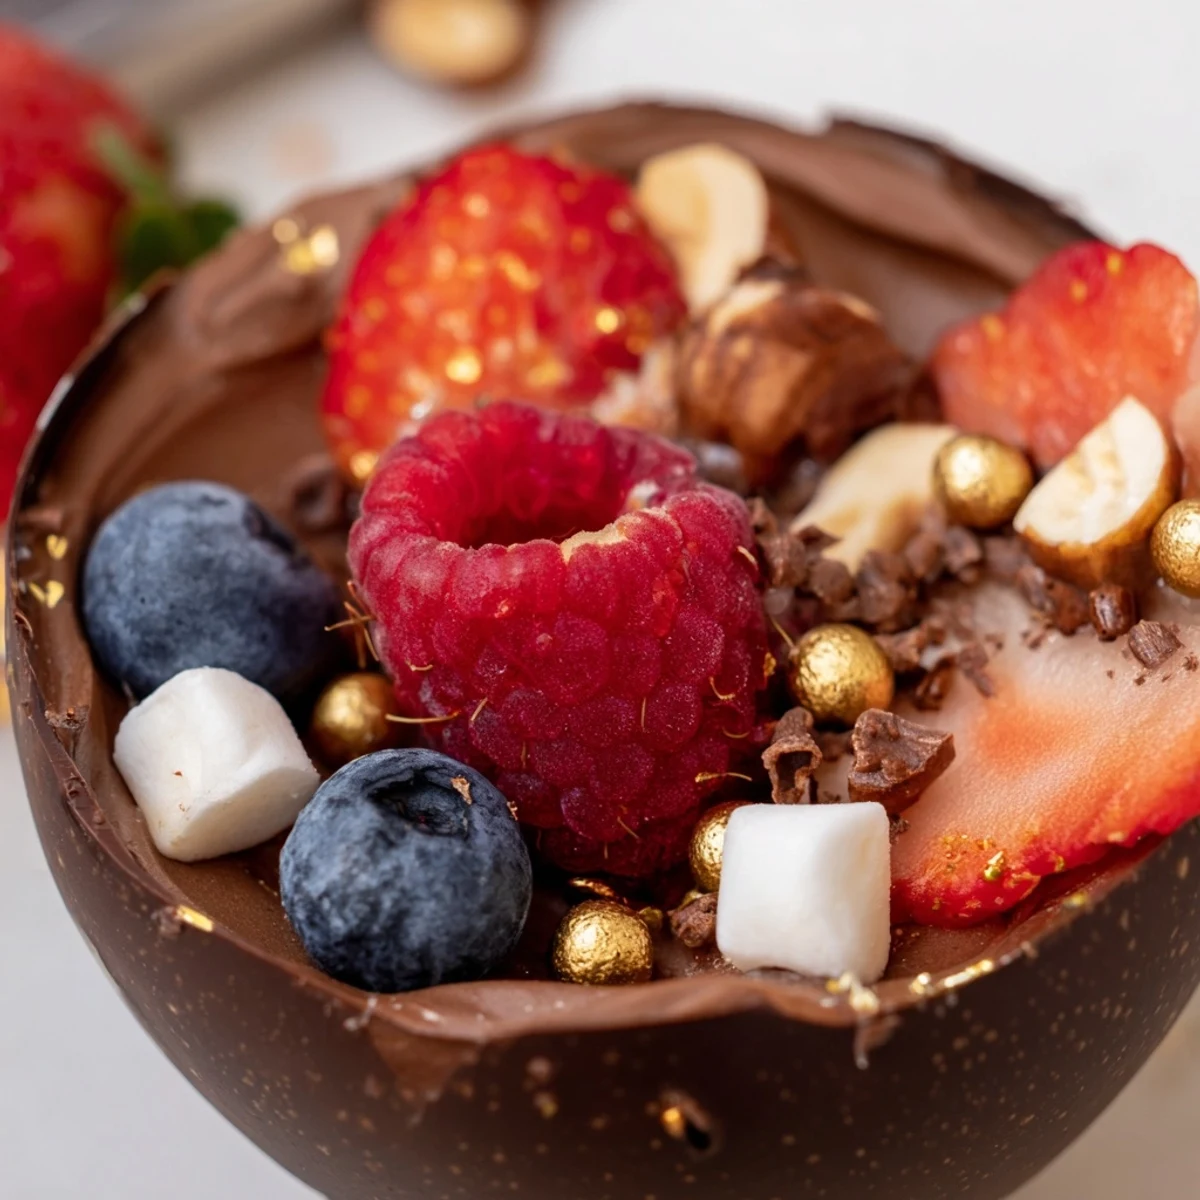
 These sophisticated chocolate grazing cups feature handmade dark chocolate vessels filled with velvety chocolate mousse, fresh mixed berries, crunchy nuts, and whimsical toppings like marshmallows and chocolate curls. The presentation creates stunning individual portions perfect for dessert tables, dinner parties, and special celebrations.
Each cup combines contrasting textures—the crisp chocolate shell, silky mousse, juicy berries, and nutty crunch—while the optional edible gold adds an extra touch of luxury. Preparation involves melting chocolate for cups, whipping cream for mousse, and creative garnishing.
Customize with white or milk chocolate variations, add orange liqueur for adults, or adjust toppings to suit seasonal preferences. These impressive individual desserts serve six and can be prepared ahead, though they're best enjoyed freshly assembled for optimal texture and presentation.
The winter evening I first made these chocolate cups, my kitchen smelled like a chocolate shop and I may have licked more chocolate off the pastry brush than actually made it into the cups. There is something ridiculously satisfying about creating edible vessels from pure chocolate watching them firm up in the refrigerator like tiny chocolate miracles waiting to be filled.
I served these at a dinner party last spring and watched my friend Sarah literally close her eyes after the first bite, which is basically the highest compliment a dessert can receive. Someone asked if I had ordered them from a boutique dessert caterer and I laughed while chocolate shavings were still clinging to my forearms.
Ingredients
- Dark chocolate (at least 60% cocoa): Higher cocoa percentage means the cups will hold their shape better at room temperature and the flavor will be more sophisticated than milk chocolate alternatives
- Heavy cream: Cold cream is essential here so give yourself time to chill the bowl and whisk for at least 15 minutes before starting
- Powdered sugar: This dissolves more easily into the cream than granulated sugar so you will not end up with gritty mousse
- Vanilla extract: Use pure vanilla extract rather than imitation for that warm rounded flavor that balances the dark chocolate intensity
- Fresh mixed berries: raspberries, strawberries, and blueberries add tartness that cuts through all the rich chocolate
- Chopped nuts: Toast them lightly in a dry pan for 2 minutes before using to bring out their natural oils
- Mini marshmallows: These add fun texture and nostalgia while providing little pockets of sweetness throughout
- Chocolate curls: Make these by running a vegetable peeler along the surface of a room temperature chocolate bar
- Edible gold leaf or pearls: Totally optional but makes these look incredibly fancy for special occasions
Instructions
- Create the chocolate cups:
- Melt the chocolate in 30 second bursts in the microwave stirring between each interval or use a double boiler for gentler heat. Paint the melted chocolate into your liners using upward strokes trying to keep the layer even but not too thin. Chill for 20 minutes until completely firm before carefully peeling away the liners.
- Prepare the mousse base:
- Melt the smaller amount of chocolate and let it cool to about body temperature so it does not seize when folded into the cream. Whip your cold cream with the powdered sugar and vanilla until you have soft peaks that just hold their shape when you lift the whisk.
- Combine into mousse:
- Stir a spoonful of whipped cream into the melted chocolate first to lighten it then gently fold the chocolate mixture back into the remaining cream using a spatula. Keep folding until no white streaks remain but be careful not to overmix or the mousse will lose its airy texture.
- Assemble and garnish:
- Fill each chocolate cup about two thirds full with mousse using a piping bag for neatness or just a regular spoon. Arrange the berries, nuts, marshmallows and chocolate curls on top finishing with gold leaf if you want that extra touch of elegance.
 Pin it
 My niece helped me assemble these last holiday season and her topping strategy was basically more is more. The cups looked absolutely chaotic but honestly that is part of the charm and everyone fought over the ones with the most marshmallows.
Making Ahead
You can make the chocolate cups up to 3 days in advance if stored in an airtight container at room temperature. The mousse holds well for 24 hours in the refrigerator but assemble the cups the same day you plan to serve them for the best texture contrast between the crisp cups and creamy filling.
Chocolate Variations
White chocolate cups are stunning and hold up surprisingly well though they are sweeter so consider using bittersweet chocolate for the mousse to balance it out. Milk chocolate cups work beautifully but need an extra 5 minutes in the refrigerator to firm up completely before you remove the liners.
Serving Suggestions
These work beautifully on a dessert table with small tasting spoons or passed on trays at cocktail parties. Pair with dessert wine like port or a rich espresso to cut through the sweetness.
- Set up a toppings bar and let guests customize their own cups for a fun interactive element
- Plate them on individual small plates or serve directly on the liner if using sturdy ones
- Have extra chocolate curls ready for guests who want an extra chocolate hit on top
 Pin it
 These chocolate cups always steal the show and nobody needs to know how simple they were to put together.
Recipe FAQs
- → How far in advance can I make these chocolate cups?
-
The chocolate cups can be prepared up to 2 days ahead and stored in an airtight container with parchment paper between layers. The mousse holds well for 24 hours. However, for best texture and appearance, assemble everything within 4-6 hours of serving.
- → What's the best way to melt chocolate without seizing?
-
Melt chocolate slowly using a double boiler or microwave at 50% power in 30-second intervals, stirring between each. Avoid any moisture contact—even a drop of water can cause seizing. If chocolate does seize, whisk in a teaspoon of vegetable oil to smooth it out.
- → Can I use white chocolate instead of dark?
-
Absolutely! White chocolate works beautifully for both cups and mousse. Note that white chocolate melts faster and burns more easily, so reduce heating time. The flavor profile becomes sweeter and creamier—pair with citrus fruits or darker berries for balance.
- → How do I prevent the chocolate cups from cracking when removing liners?
-
Ensure chocolate is completely set before attempting removal—minimum 20 minutes in the refrigerator. Gently peel liners starting from the top edge, working slowly. If chocolate feels soft, return to fridge for another 10-15 minutes. Silicone liners release more easily than paper ones.
- → What other toppings work well with these cups?
-
Beyond the suggested toppings, try crushed cookies, toasted coconut, caramelized nuts, fresh figs, pomegranate seeds, candied citrus peel, or edible flowers. For seasonal variations, use pumpkin spice in fall or tropical fruits in summer. The possibilities are endless for customizing.
- → Can these be made vegan or dairy-free?
-
Yes! Use dairy-free dark chocolate and coconut cream or plant-based heavy cream alternative for the mousse. Coconut cream whips beautifully and adds subtle tropical flavor. Ensure all toppings are vegan—skip marshmallows unless specifically labeled vegan, and verify your chocolate is dairy-free.
