 Pin it
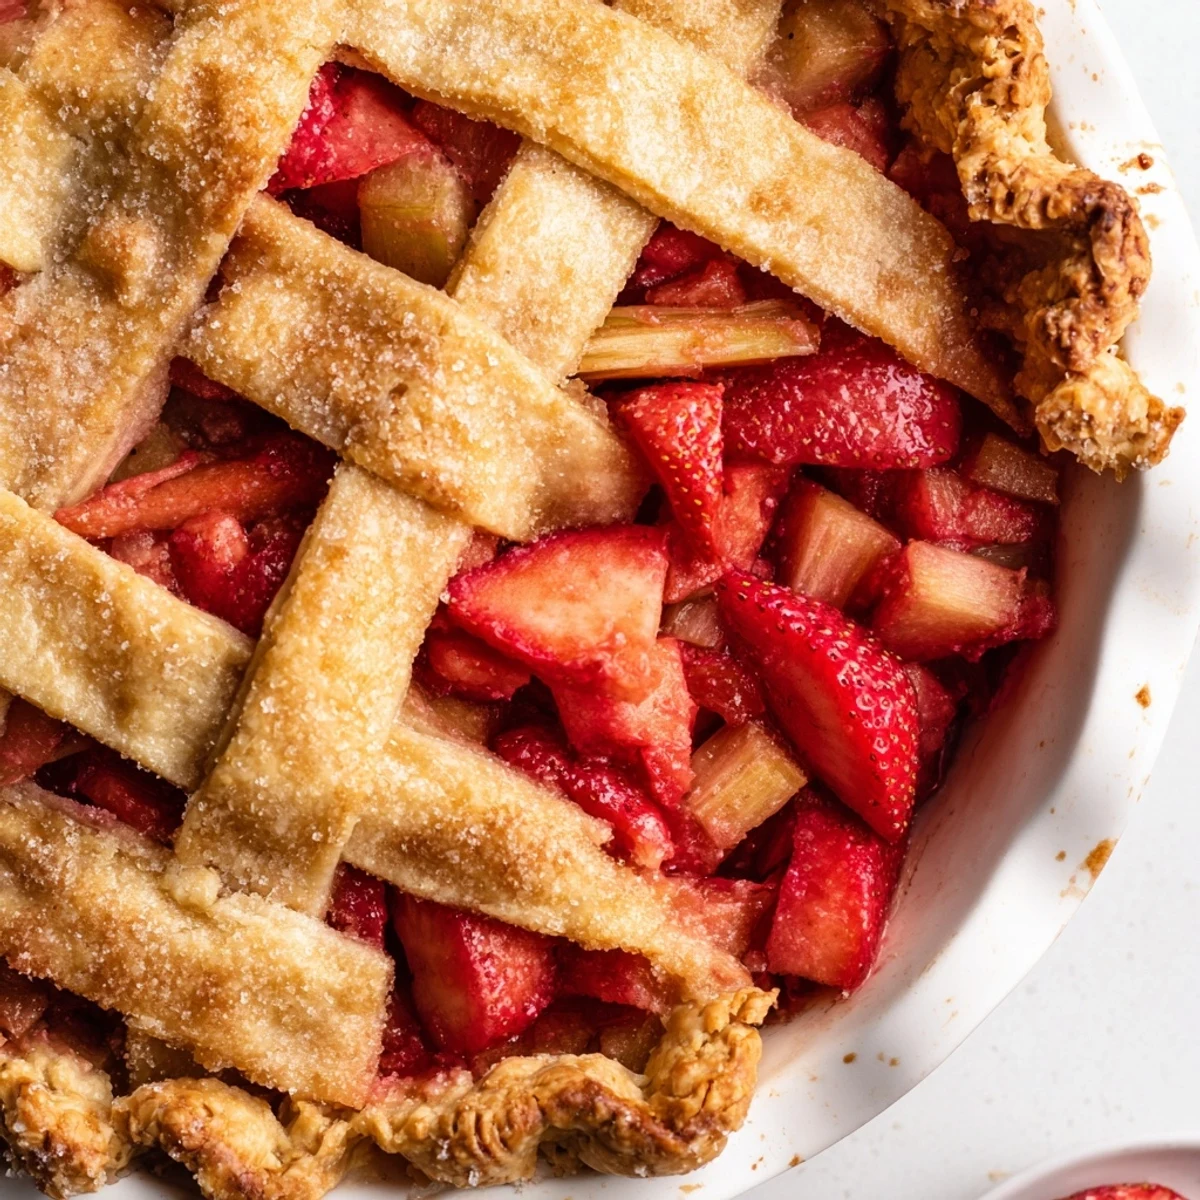
 This gluten-free strawberry and rhubarb pie combines a tender, flaky gluten-free crust with a sweet-tart fruit filling thickened with cornstarch and brightened by lemon. Chill the dough before rolling to keep edges crisp; bake until the filling bubbles and the crust is golden. Let cool so slices set. Swap butter and egg for plant-based alternatives to make it vegan.
The screen door slammed shut behind me as I balanced a colander overflowing with strawberries from the farmers market, already plotting pie. Rhubarb is one of those ingredients that confuses people at first glance, all celery like and impossibly sour, but pair it with sweet June berries and something magical happens. My neighbor Deb once watched me wrestle with a gluten free crust and declared it impossible, which only made me more stubborn. Two pies later, she asked for the recipe.
I made this for a Memorial Day cookout where three different people hovered near the kitchen counter waiting for it to cool enough to slice. One friend literally clapped when the first piece held its shape without collapsing everywhere. Small victories.
Ingredients
- Gluten free all purpose flour blend (300 g): Not all blends behave the same, so pick one that already contains xanthan gum for the most reliable texture.
- Sugar (for crust, 1 tbsp): Just enough sweetness to round out the dough without making it overly tender.
- Salt (for crust, 1/2 tsp): Salt in pastry is non negotiable, it makes the butter taste more like itself.
- Cold unsalted butter, cubed (230 g): The colder the better, and freeze it for ten minutes before cutting in if your kitchen runs warm.
- Large egg (for crust): Adds structure that gluten free dough desperately needs to hold together.
- Ice water (4 to 6 tbsp): Start with less than you think, you can always add more but you cannot take it back.
- Strawberries, hulled and sliced (250 g): Smaller berries often have more concentrated flavor than the giant picture perfect ones.
- Rhubarb, diced (250 g): Aim for pieces roughly the same size as your strawberry slices so everything cooks evenly.
- Granulated sugar (150 g for filling): This amount hits the sweet spot, but taste your fruit first and adjust if the berries are especially sweet or tart.
- Cornstarch (30 g): The thickening hero that turns juicy chaos into sliceable pie.
- Ground cinnamon (1/4 tsp): Barely there, just enough to add warmth without screaming cinnamon.
- Salt (1/8 tsp for filling): A tiny pinch makes every flavor sharper and more defined.
- Lemon juice (1 tbsp): Brightens the whole filling and keeps the strawberries tasting fresh.
- Egg, beaten (for wash): Gives the top crust that deep golden shine.
- Sugar (for sprinkling, 1 tsp): A crunchy, sparkly finish that makes the top look bakery worthy.
Instructions
- Build the crust:
- Whisk the flour, sugar, and salt together, then cut in the cold butter with a pastry blender until you see pea sized bits throughout. Work quickly so the butter stays cold, your warmth is the enemy here.
- Bring the dough together:
- Beat the egg with four tablespoons of ice water and drizzle it in gradually, mixing gently until the dough just holds when you squeeze a handful. Divide into two flat discs, wrap tightly, and chill for at least one hour.
- Heat the oven:
- Set it to 400 degrees Fahrenheit and place a baking sheet inside while it preheats so the pie starts on a hot surface for a crisp bottom.
- Toss the filling:
- Combine the strawberries, rhubarb, sugar, cornstarch, cinnamon, salt, and lemon juice in a big bowl, folding gently so you do not crush the berries. Let it sit for five minutes so the sugar starts drawing out those gorgeous pink juices.
- Roll and line the plate:
- Roll one disc between two sheets of parchment paper to fit a nine inch pie plate, then ease it in gently without stretching. Gluten free dough tears easily, so patch any cracks with your fingers and a dab of water.
- Fill the pie:
- Pour the fruit mixture in and spread it into an even layer, making sure the rhubarb is distributed throughout so every slice gets the sweet tart balance.
- Top and seal:
- Roll the second disc and drape it over the filling, or weave a lattice if you are feeling ambitious, then crimp the edges firmly. Brush with beaten egg and sprinkle with sugar for that golden sparkle.
- Bake until golden:
- Set the pie on the hot baking sheet and bake for 45 to 50 minutes until the crust is deeply golden and you see bubbling juice peeking through the vents. If the edges brown too fast, tent them loosely with foil.
- Cool with patience:
- Let it rest on a rack for at least two hours before slicing so the filling sets properly and you get clean, beautiful pieces.
 Pin it
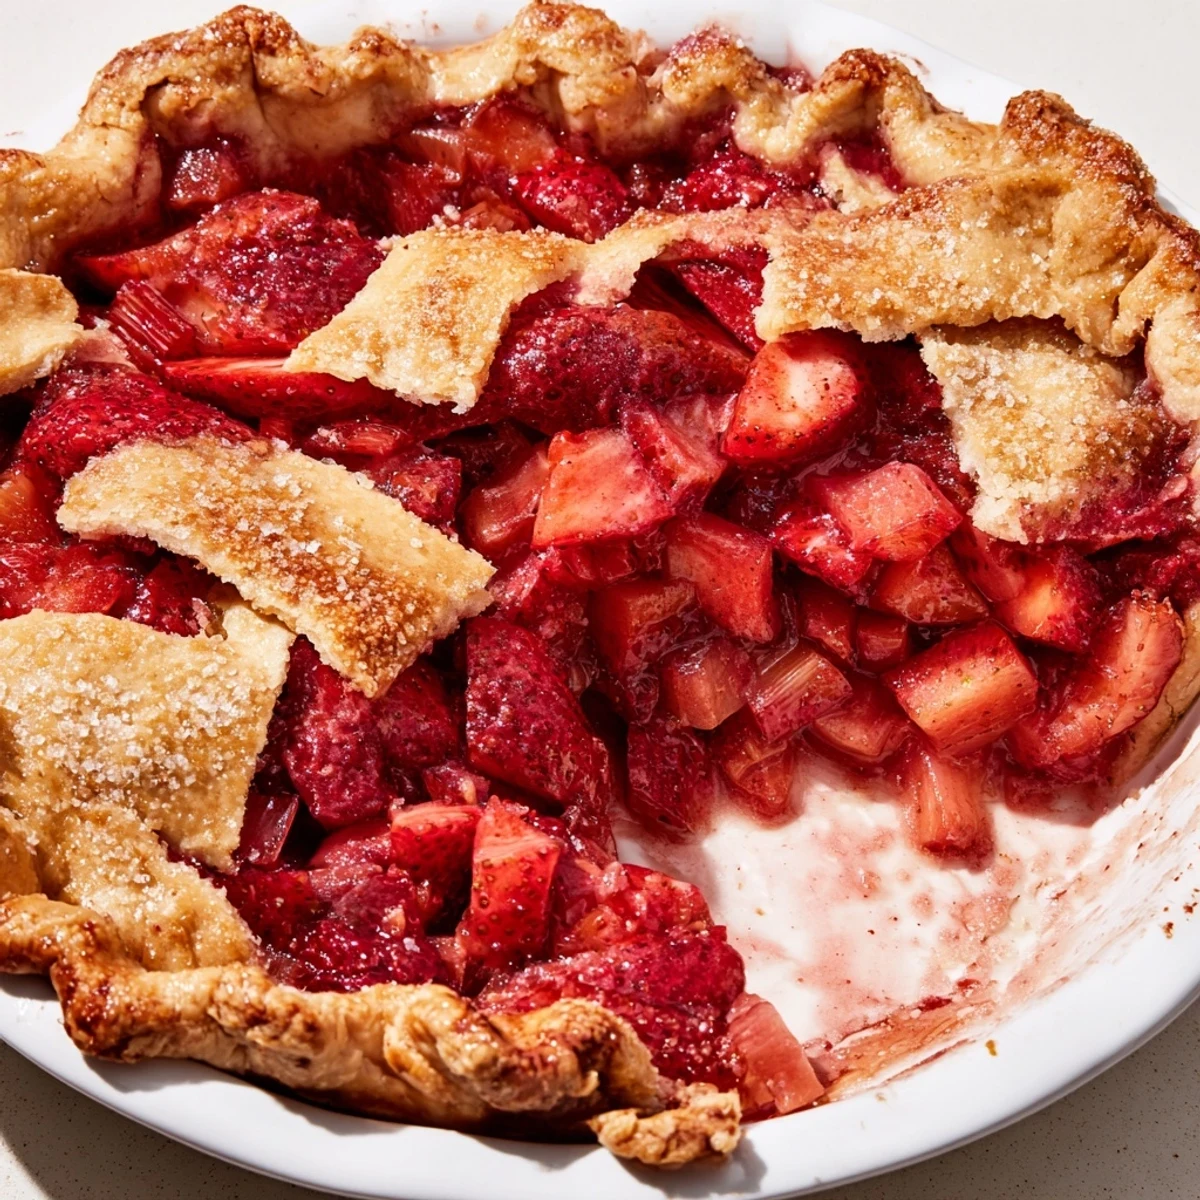
 The moment this pie officially entered my permanent rotation was a rainy Sunday when my partner stood in the kitchen eating a wedge over the sink before it had even finished cooling. No plate, no fork, just pure greed. That is the highest compliment any recipe can receive.
Tools That Actually Matter
A nine inch pie plate is non negotiable for the right filling to crust ratio. I learned the hard way that a deep dish pan throws off the baking time and leaves you with a soggy center. A simple glass plate lets you check the bottom crust for doneness without guessing.
Serving It Right
Vanilla ice cream melting into a warm slice is the classic move for good reason, the cold cream against the tart fruit is unbeatable. Whipped cream works too, especially if you add a whisper of vanilla bean. This pie also tastes shockingly good cold for breakfast, though I will leave that choice to you.
Making It Your Own
Once you have the base recipe down, start playing with small changes to keep things interesting.
- Swap half the strawberries for raspberries to push the tartness even further in a wonderful direction.
- Add a tablespoon of finely grated fresh ginger to the filling for a subtle warmth that pairs beautifully with rhubarb.
- Always check every ingredient label for gluten free certification, even products that seem obvious.
 Pin it
 This pie tastes like the best kind of spring afternoon, warm kitchen and all. Share it with someone who will eat it over the sink.
Recipe FAQs
- → How do I prevent a soggy bottom?
-
Chill the dough before rolling and preheat the oven fully. Use cornstarch in the filling to absorb excess juice, and bake the pie on a hot baking sheet to help the base crisp. Let the pie cool thoroughly so the filling sets before slicing.
- → Can I reduce the sweetness of the filling?
-
Yes. Cut the granulated sugar by 25% or substitute part with a natural sweetener. Taste the fruit first—very ripe strawberries may need less sugar. Remember cornstarch needs some sugar to gel predictably, so adjust cautiously.
- → Which gluten-free flour works best for the crust?
-
Use a blend labeled for 1:1 baking that contains a mix of rice flour, starches, and xanthan gum for structure. A blend with a small amount of starch helps produce a tender, flaky crust similar to traditional pastry.
- → How can I make a vegan version?
-
Swap cold butter for a firm plant-based butter and replace the egg in the dough with a flax egg (1 tbsp ground flax + 3 tbsp water). Brush the top with non-dairy milk and a touch of maple syrup for shine instead of egg wash.
- → Any tips for a beautiful lattice or golden top?
-
Work with well-chilled dough and use a sharp knife or pastry cutter for clean strips. Chill the assembled pie for 15–20 minutes before baking to help maintain shape. Brush with egg wash or non-dairy milk and sprinkle sugar for added color and crunch.
- → Can I freeze the pie ahead of time?
-
You can freeze the unbaked, assembled pie wrapped tightly for up to one month; bake from frozen but allow extra baking time and cover edges if they brown too quickly. Alternatively, freeze cooled baked slices for quick thawing and serving.
