 Pin it
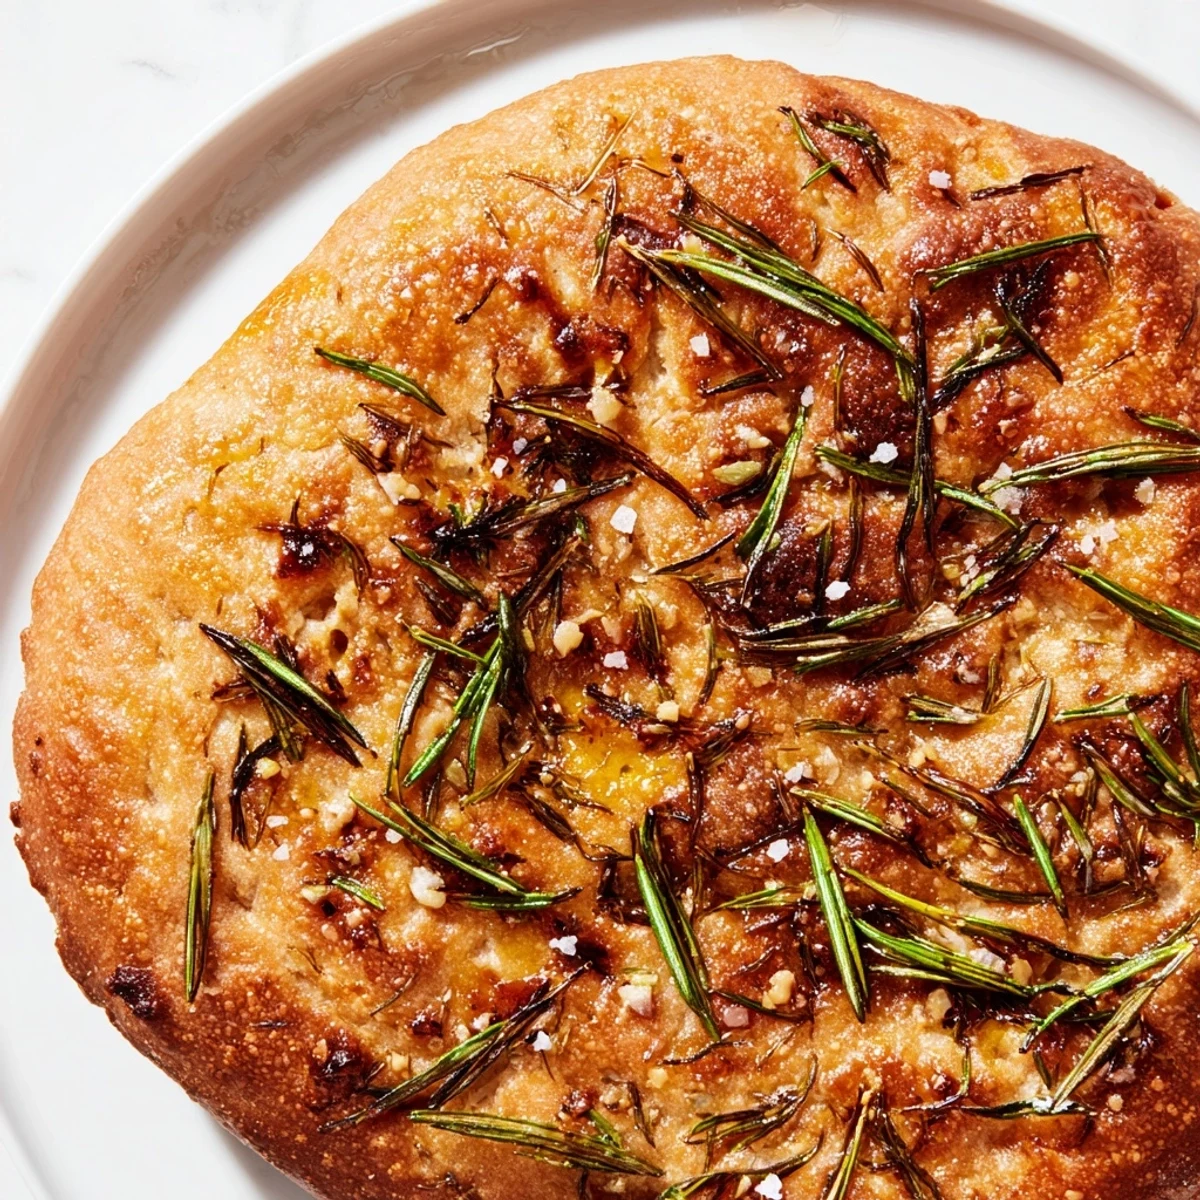
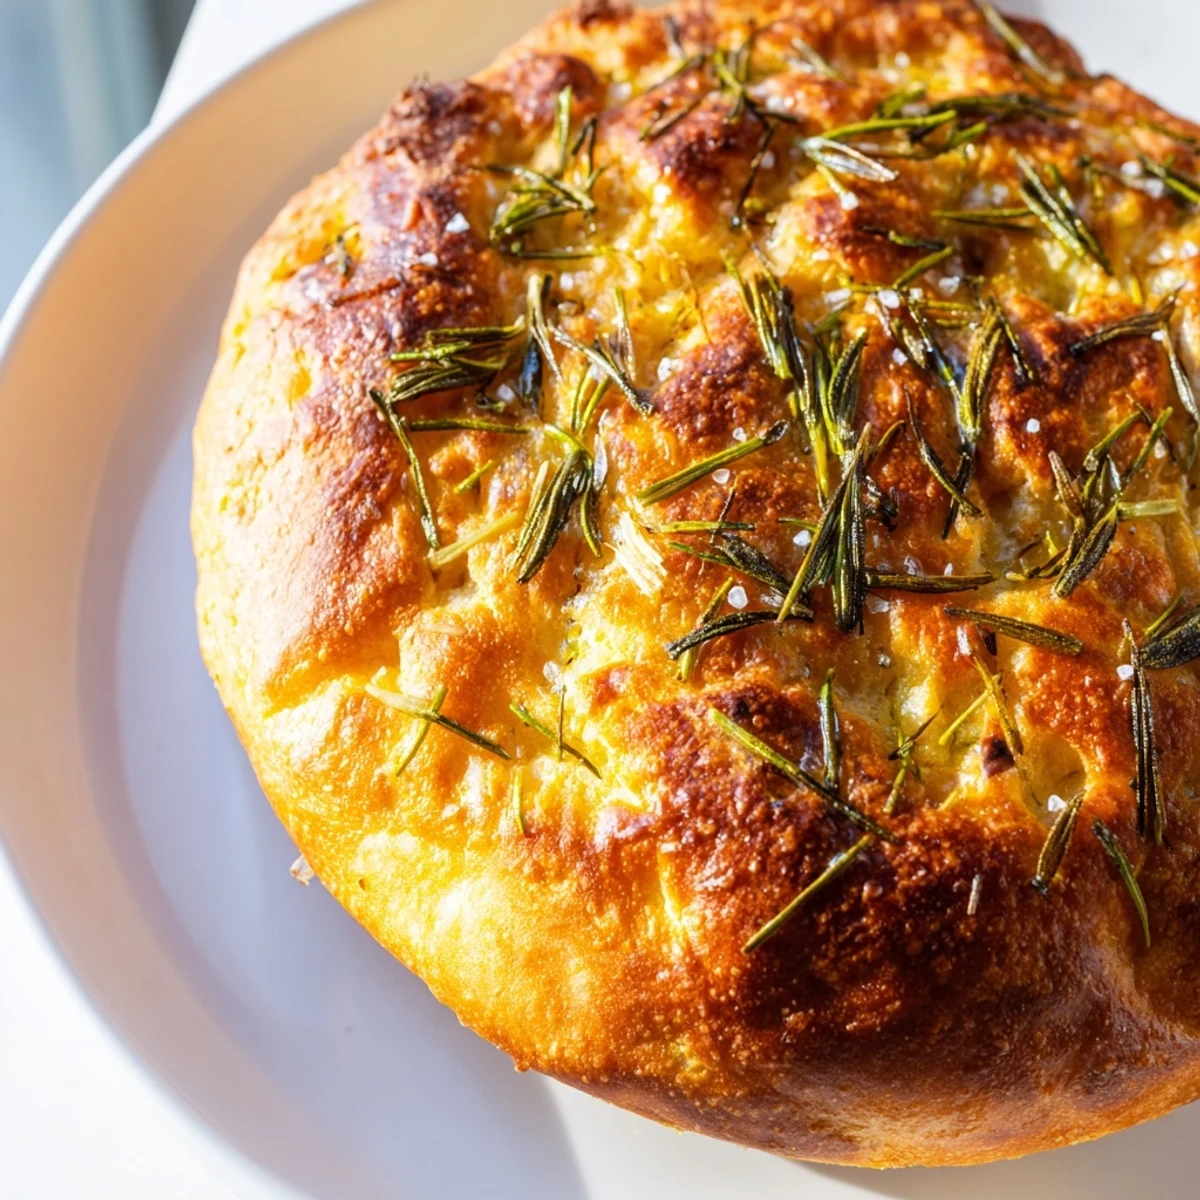
 This rustic skillet bread delivers the perfect balance of textures—crisp, golden edges giving way to a tender, chewy interior. The combination of roasted garlic and fresh rosemary creates an aromatic profile that fills your kitchen while baking. Simple ingredients come together in a cast iron skillet for impressive results that rival artisan bakery loaves. The dough requires just one rise, making this approachable for bakers of any skill level. Serve warm alongside soups, stews, or simply with olive oil for dipping.
The first time I made skillet bread, I was camping with friends and we cooked everything over an open fire. When I tried recreating that rustic magic at home, a cast iron skillet became my secret weapon for getting those impossibly crispy edges while keeping the inside tender and full of those little air pockets that catch butter and olive oil so beautifully.
Last winter, my neighbor came over shivering from a walk in the snow, and I pulled this bread fresh from the oven. We stood there ripping off chunks, steam rising between our fingers, and she admitted she usually hates rosemary but couldnt stop eating this. The garlic gets mellow and sweet as it bakes, perfuming every crumb without being overpowering.
Ingredients
- Bread Flour: The higher protein content creates that satisfying chew and helps the bread develop structure in the skillet
- Active Dry Yeast: Make sure your water is warm but not hot, around 105°F, to wake up those little organisms without killing them
- Fresh Rosemary: Woodier stems can go right in the dough, but strip the leaves and chop them finely for even distribution
- Roasted Garlic: If you have time to roast the cloves first, the flavor becomes sweeter and more complex, almost spreadable
- Flaky Sea Salt: This finishing touch creates those delicious salty bursts on top that make each bite interesting
Instructions
- Wake Up the Yeast:
- Whisk the warm water and yeast in a large bowl, then walk away for five minutes. Come back to find it foamy and alive, which means its ready to work its magic.
- Build the Dough:
- Add flour and salt to the yeast mixture, mixing until a shaggy mess forms. Turn it onto a floured surface and knead for 5 to 7 minutes until the dough feels smooth and slightly tacky, like a babys cheek.
- Add the Magic:
- Drizzle in olive oil, rosemary, and garlic, then knead just until everything is distributed. You want flecks of green and white running through the dough like little flavor treasure maps.
- Let It Rise:
- Place dough in a greased bowl, cover with a damp towel, and find the warmest spot in your kitchen. Wait an hour until it has doubled in size and feels puffy and alive.
- Prepare Its Home:
- Generously oil your skillet, then press the risen dough gently toward the edges. Let it rest again for 25 to 30 minutes, covered, while you preheat the oven to 425°F.
- Give It a Bath:
- Brush the top with remaining olive oil and scatter flaky sea salt across the surface. This is what creates that irresistible golden crust and those salty pops of flavor.
- Bake to Perfection:
- Slide the skillet into the hot oven and bake for 30 to 35 minutes. The bread is done when it is deeply golden and sounds hollow when tapped on the bottom.
 Pin it
 My sister used to claim she could not bake anything with yeast until I watched her make this recipe. The problem was not her skills, it was that she kept checking the dough every ten minutes and knocking out all the air. When she finally trusted the process and walked away, she texted me a photo of the most beautiful golden bread with hearts all around it.
Choosing Your Skillet
Cast iron conducts heat beautifully and creates those crispy edges we are after, but any oven safe skillet will work in a pinch. I have made this in enameled cast iron and even a deep cake pan when my cast iron was otherwise occupied. The bread will still be delicious, just adjust the baking time by a few minutes.
Herb Variations
While rosemary and garlic are a classic combination, do not be afraid to play around. Thyme and lemon zest brighten everything up for summer, or try sage and caramelized onions for a more autumnal vibe. The technique stays the same, and the dough is surprisingly forgiving with different flavor profiles.
Serving Ideas
This bread is begging to be torn and shared, but it also makes exceptional toast the next day. I love serving it alongside a hearty soup or stew, where it can soak up all those flavorful juices. Sometimes I just put out a bowl of good olive oil for dipping and let people help themselves.
- Warm any leftovers in a 350°F oven for 5 minutes to refresh that just baked texture
- Try rubbing a raw garlic clove over the hot bread for an extra punch of flavor
- Wrap cooled bread tightly in foil and freeze for up to a month if you somehow do not eat it all immediately
 Pin it
 There is something profoundly satisfying about making bread with your own hands, especially one that looks this impressive with so little effort. Pull this skillet out at your next gathering and watch as people tear off pieces, eyes lighting up with that first bite of warm, garlicky goodness.
Recipe FAQs
- → Can I make this bread without a cast iron skillet?
-
Yes, you can use any oven-safe 10-inch skillet or baking dish. A cast iron skillet produces the crispiest edges and most even baking, but stainless steel or ceramic alternatives work well too. Just ensure your chosen vessel is rated for high oven temperatures.
- → Should I roast the garlic before adding it to the dough?
-
Roasting the garlic first will yield a sweeter, milder flavor profile. If you prefer a more pronounced garlic kick, add it raw as minced. To roast, wrap peeled cloves in foil with olive oil and bake at 400°F for 25-30 minutes until soft and golden.
- → Can I substitute fresh rosemary with dried herbs?
-
Fresh rosemary provides the best flavor and texture, but you can use dried rosemary in a pinch. Use one-third the amount—about 2 teaspoons instead of 2 tablespoons. Thyme or sage also work beautifully as alternatives, using the same quantity as fresh rosemary.
- → How do I know when the bread is fully baked?
-
The bread is done when the top is deep golden brown and the crust sounds hollow when tapped gently. An instant-read thermometer inserted into the center should read 190-200°F. The internal temperature is the most reliable indicator of doneness.
- → Can I prepare the dough ahead of time?
-
You can refrigerate the dough after the first rise for up to 24 hours. Let it come to room temperature for about 30 minutes before shaping into the skillet for the second rise. This actually develops more complex flavors. Alternatively, bake completely and freeze for up to 3 months.
- → Why is my dough too sticky or too dry?
-
Humidity and flour absorption vary, so adjust accordingly. If the dough is too sticky to handle, add flour one tablespoon at a time. If it's dry and cracking, add water one teaspoon at a time. The dough should feel slightly tacky but not stick excessively to your hands.
