 Pin it
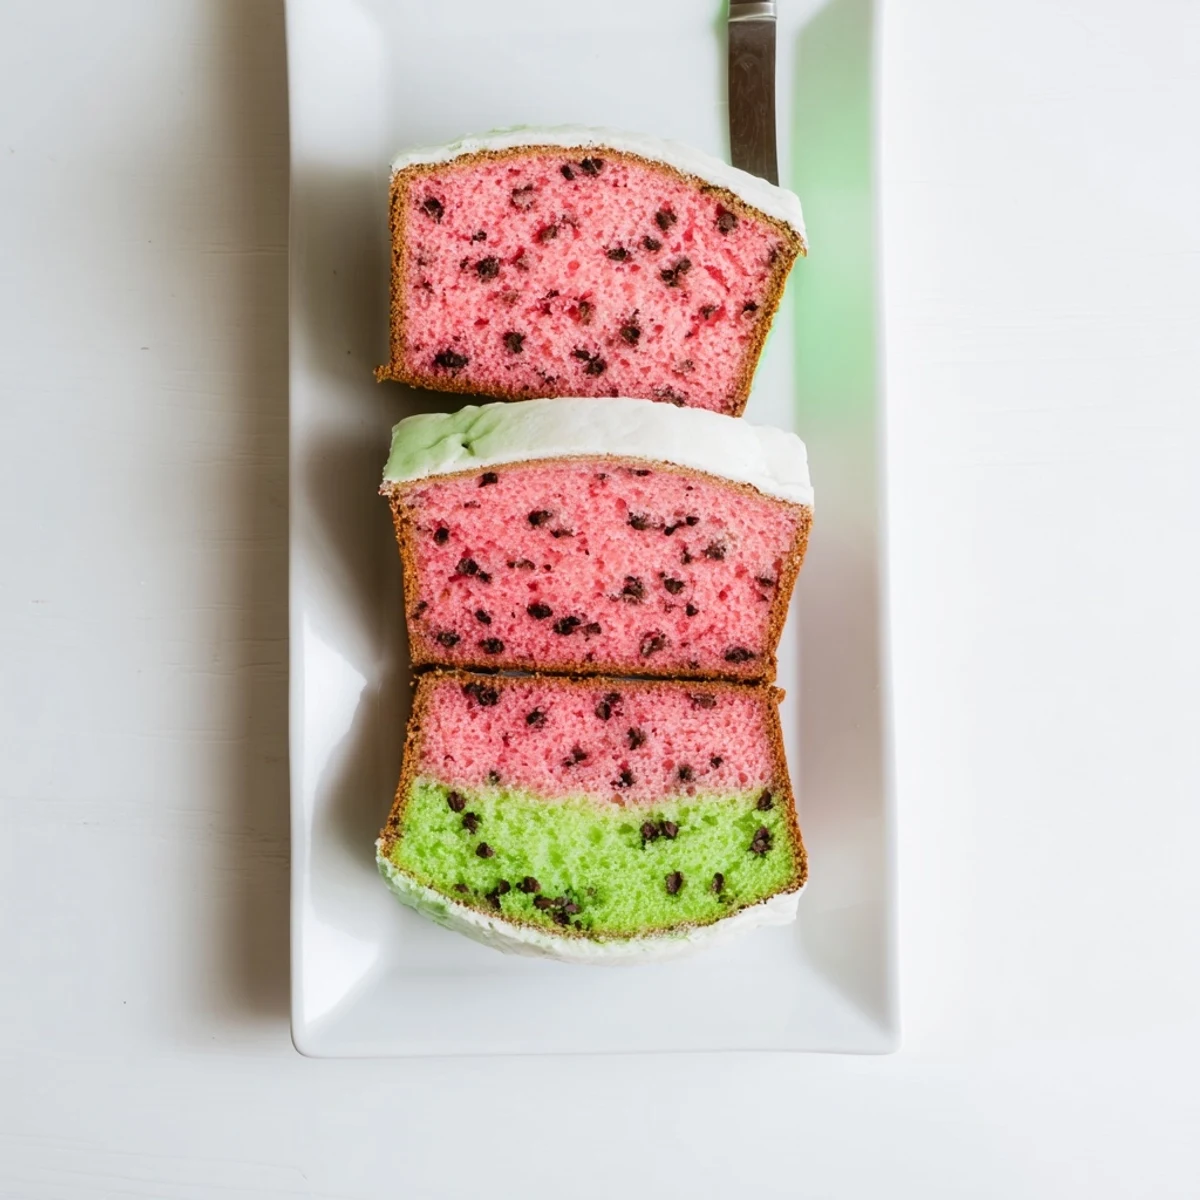
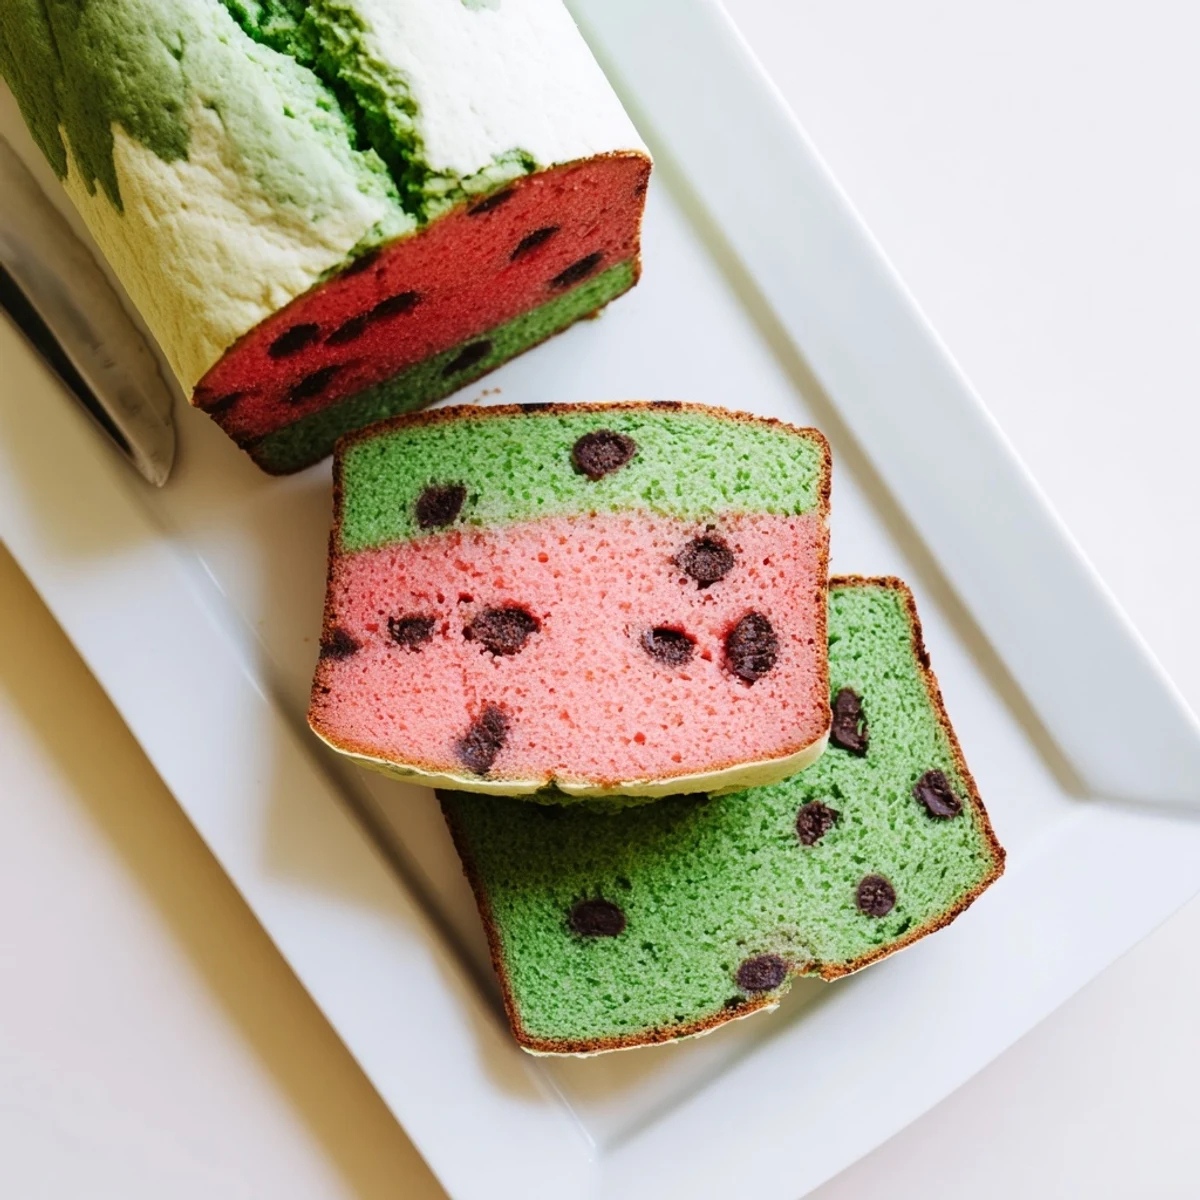
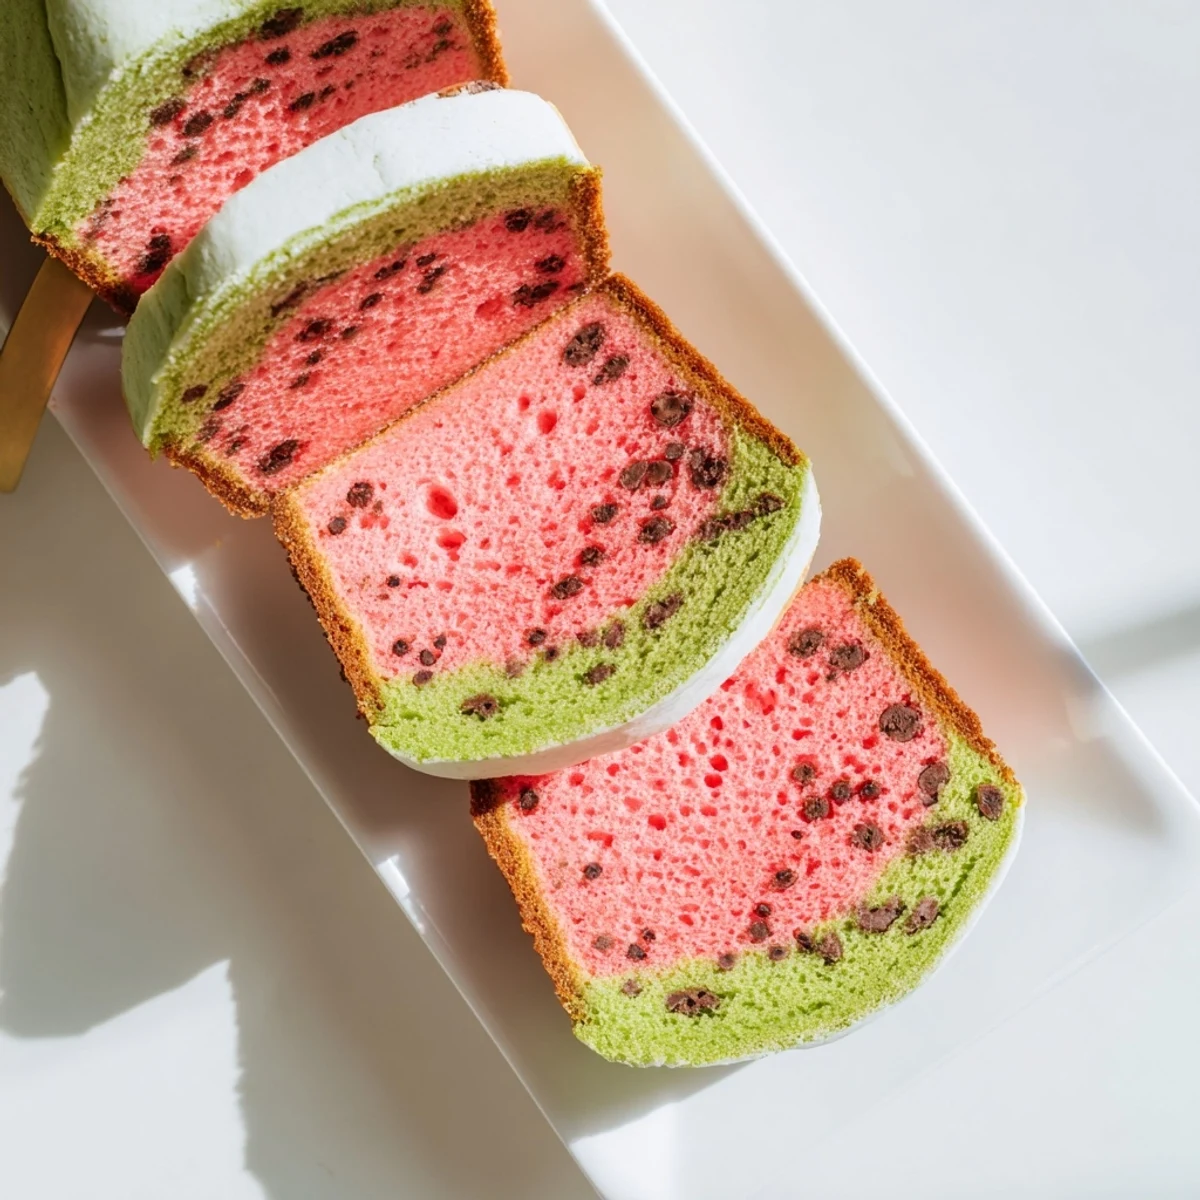
 This creative loaf captures the iconic appearance of watermelon with three distinct colored layers—red, white, and green. The dough gets divided and tinted with food coloring, then stacked to reveal the classic pattern when sliced. Mini chocolate chips add realistic seeds throughout the red center. The result is a soft, slightly sweet bread that tastes delightful and makes an impressive presentation.
The first time I pulled this loaf from the oven, my kids stood there in genuine disbelief. They kept asking if it was real bread or some kind of magic trick from a storybook. That moment of wonder made every minute of dough staining and careful layering absolutely worth it.
I made this for a summer potluck last year and watched three different adults take photos before even considering eating it. My neighbor asked for the recipe before she even took her first bite. Sometimes food is just as much about the joy it brings as the taste itself.
Ingredients
- Bread flour: The higher protein content creates structure that holds all those layers together without collapsing
- Active dry yeast: Gives reliable rise and helps develop that tender, pillowy crumb we want
- Warm milk: Should feel like a comfortable bath temperature, around 110°F, to activate yeast without killing it
- Unsalted butter: Room temperature softness helps it incorporate evenly into the dough for consistent texture
- Cocoa powder: Actually used sparingly here to deepen the red color rather than for chocolate flavor
- Matcha powder: Creates that authentic green rind color while adding subtle earthiness
- Red gel food coloring: Gel delivers intense color without adding excess liquid that could throw off dough consistency
- Mini chocolate chips: These tuck perfectly into the dough to create convincing watermelon seeds
Instructions
- Mix the foundation:
- Combine flour, sugar, yeast and salt in your stand mixer. The flour should feel soft and silky between your fingers.
- Build the dough:
- Pour in warm milk, crack in the egg, and add softened butter. Mix until everything comes together in a shaggy mass that pulls away from the sides.
- Knead to perfection:
- Let the mixer work for 8 to 10 minutes until the dough transforms into something smooth and elastic. You should be able to stretch a small piece without it tearing immediately.
- Portion strategically:
- Divide the dough into three pieces with about 60% for the red flesh, 25% for white rind, and 15% for green skin. A kitchen scale helps get these proportions precise.
- Create the red center:
- Work red coloring and watermelon extract into the largest portion. The color should be vibrant and uniform throughout before you fold in the chocolate chip seeds.
- Prepare the layers:
- Keep the medium portion plain white for the rind. Mix matcha or green coloring into the smallest portion until it reaches that classic watermelon exterior shade.
- First rise:
- Shape each colored portion into a ball and place in separate greased bowls. Cover them warmly and let them rise for about an hour until doubled in size.
- Layer the magic:
- Punch down each dough and flatten the red portion into a log shape. Wrap the white dough around it completely, then wrap the green dough around both layers.
- Seal and shape:
- Pinch all seams tightly to seal them shut. Place the loaf seam side down in your greased pan and let it rise another 30 to 45 minutes until puffy and proud.
- Bake to perfection:
- Bake at 350°F for 30 to 35 minutes. If the top starts browning too quickly, tent it loosely with foil to protect the exterior.
- The patience moment:
- Cool in the pan for 10 minutes, then turn out onto a wire rack. Wait until completely cooled before slicing or the pattern will smear and disappoint.
 Pin it
 My daughter now requests this for her birthday instead of cake. Something about breaking open a watermelon that is actually bread feels like the best kind of kitchen magic to her. Those little moments of joy are why I keep baking.
Getting Even Layers
The trick to clean distinct layers is rolling each dough portion to the same thickness before assembling. If one section is too thick, it will not wrap properly and the pattern will look uneven or lopsided.
Color Distribution
Work the coloring in thoroughly but quickly, as overworking can toughen the dough. Wear gloves to avoid stained hands and use a bench scraper to fold the dough repeatedly until no streaks remain.
Storage and Serving
This bread actually tastes better on day two when flavors have melded. Store tightly wrapped at room temperature and toast individual slices for the best texture and melted seed experience.
- Try it toasted with cream cheese for a fun breakfast twist
- The bread makes excellent French French that looks absolutely wild
- Slices freeze beautifully for up to two months if well wrapped
 Pin it
 Every time I slice into this loaf, I smile at how something so simple can bring so much delight to an ordinary Tuesday afternoon. Hope it brings that same wonder to your kitchen.
Recipe FAQs
- → What does watermelon bread taste like?
-
The bread has a subtly sweet flavor profile with hints of vanilla and fruity notes from the watermelon extract. The texture is tender and soft like traditional sandwich bread, while chocolate chips add occasional bursts of richness throughout each slice.
- → Can I make this without food coloring?
-
Natural alternatives include beet juice for red, matcha powder for green, or simply leave portions uncolored for a more subtle effect. The colors won't be as vibrant, but the layered structure and chocolate chip seeds will still create the watermelon appearance.
- → How long does the dough need to rise?
-
Plan for approximately 1 hour for the initial rise after coloring and shaping the dough portions. A second rise of 30–45 minutes occurs after assembling the loaf in the pan, ensuring the bread develops proper structure and volume.
- → Can I freeze watermelon bread?
-
Yes, wrap the completely cooled loaf tightly in plastic wrap followed by aluminum foil. Freeze for up to 3 months. Thaw overnight at room temperature before serving. Individual slices can also be frozen and toasted directly from frozen.
- → What's the best way to slice this bread?
-
Use a sharp serrated knife with gentle sawing motions to maintain clean layers. For the most impressive presentation, slice thick pieces that clearly show all three colored sections and chocolate chip seed distribution.
- → Can I make this dairy-free?
-
Substitute warm plant-based milk for dairy milk and use vegan butter or coconut oil. The texture remains similar, though the richness may vary slightly depending on your alternative ingredients chosen.
