 Pin it
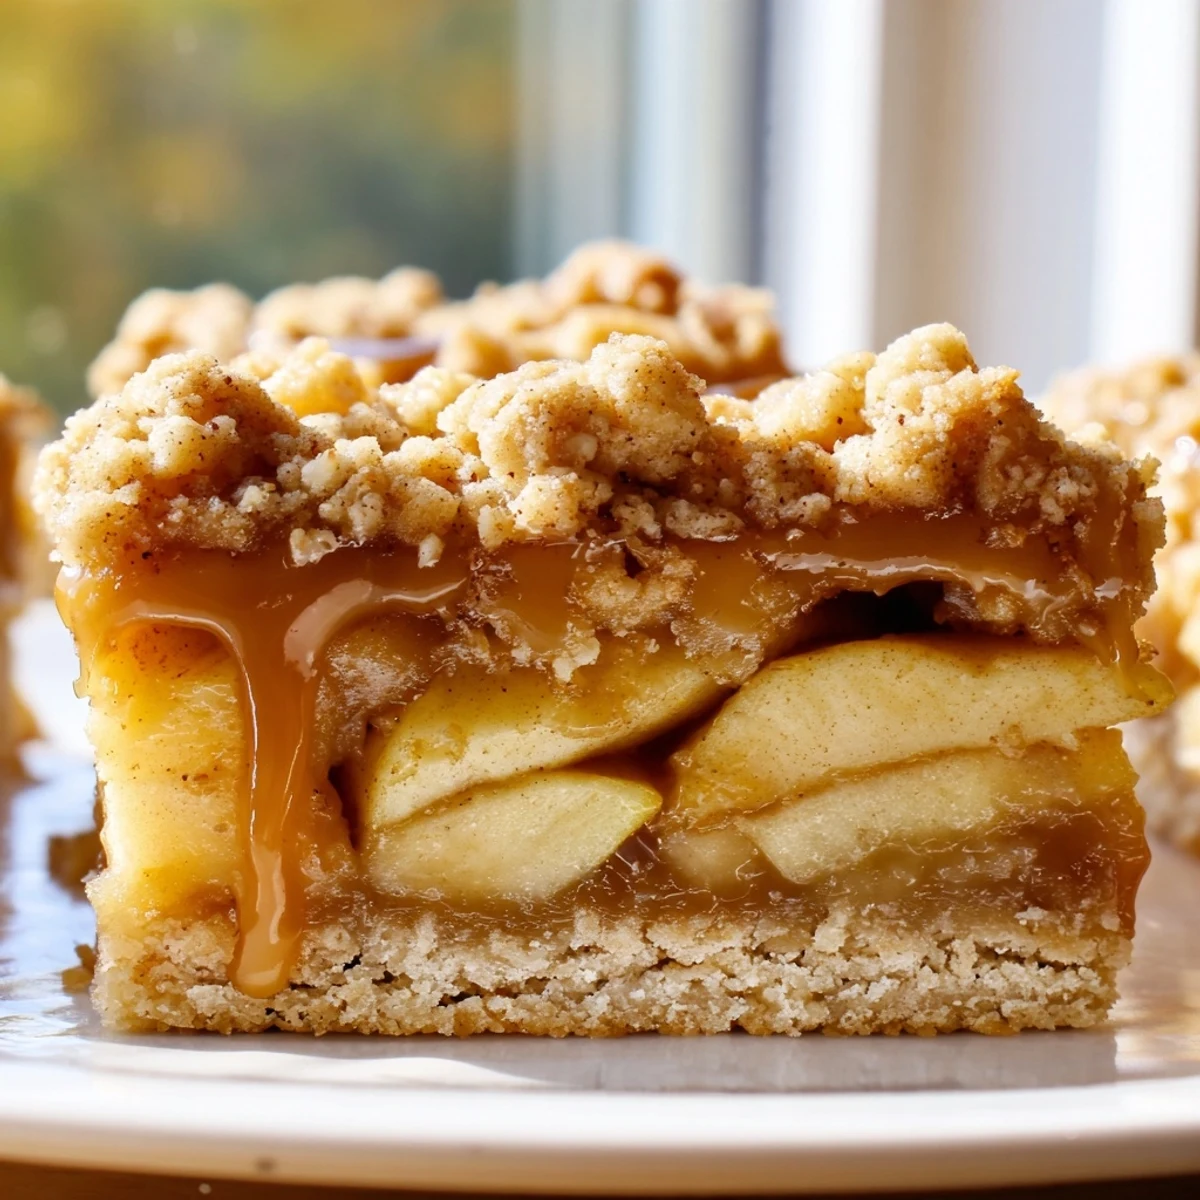
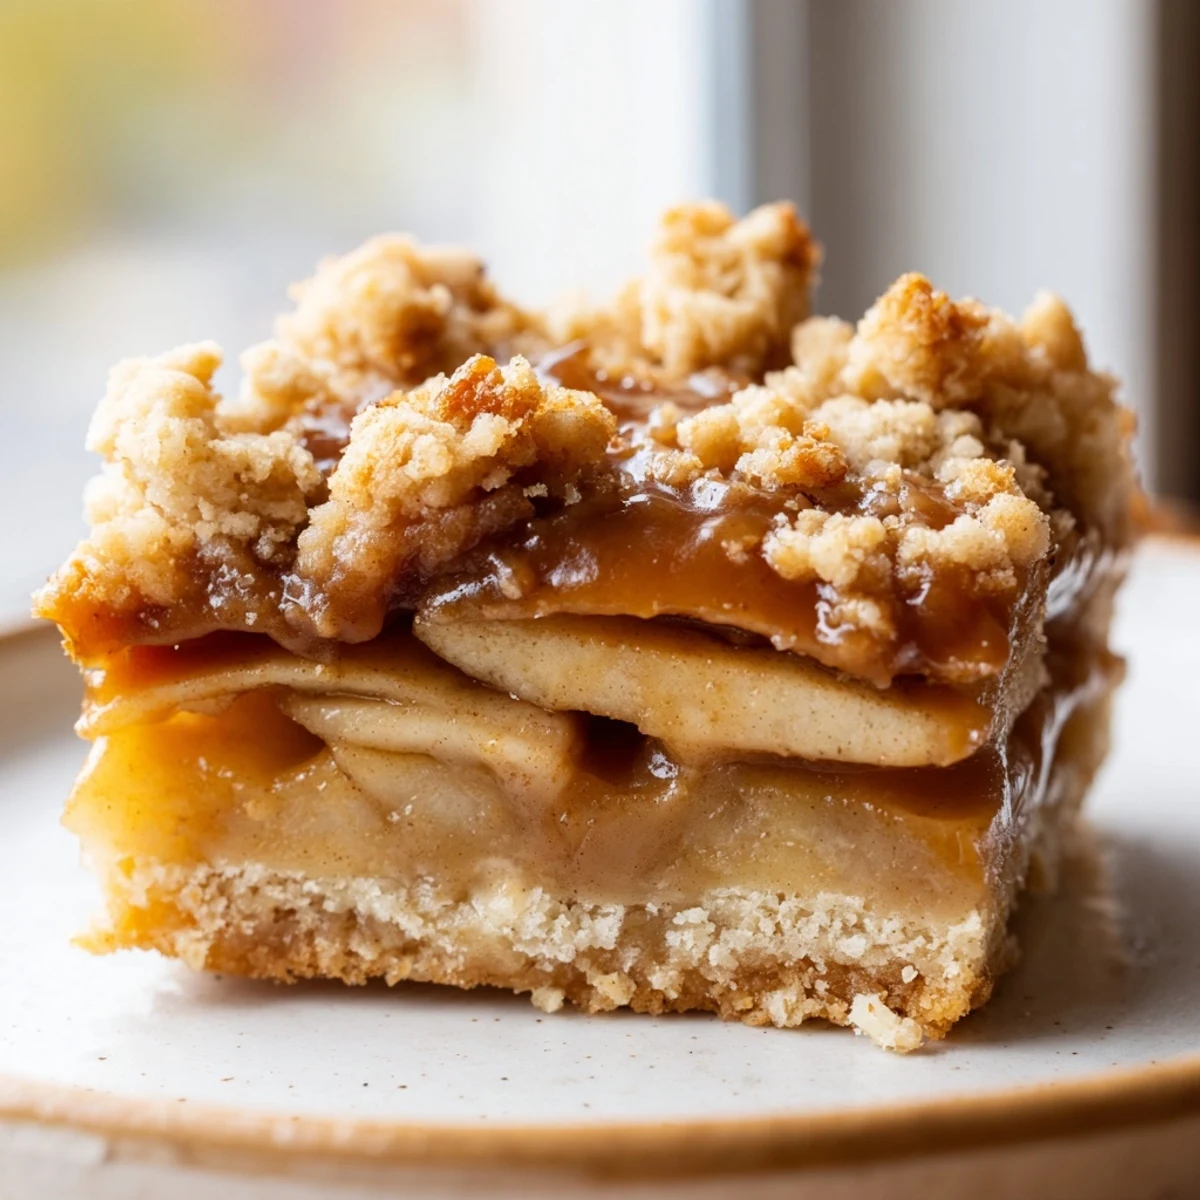
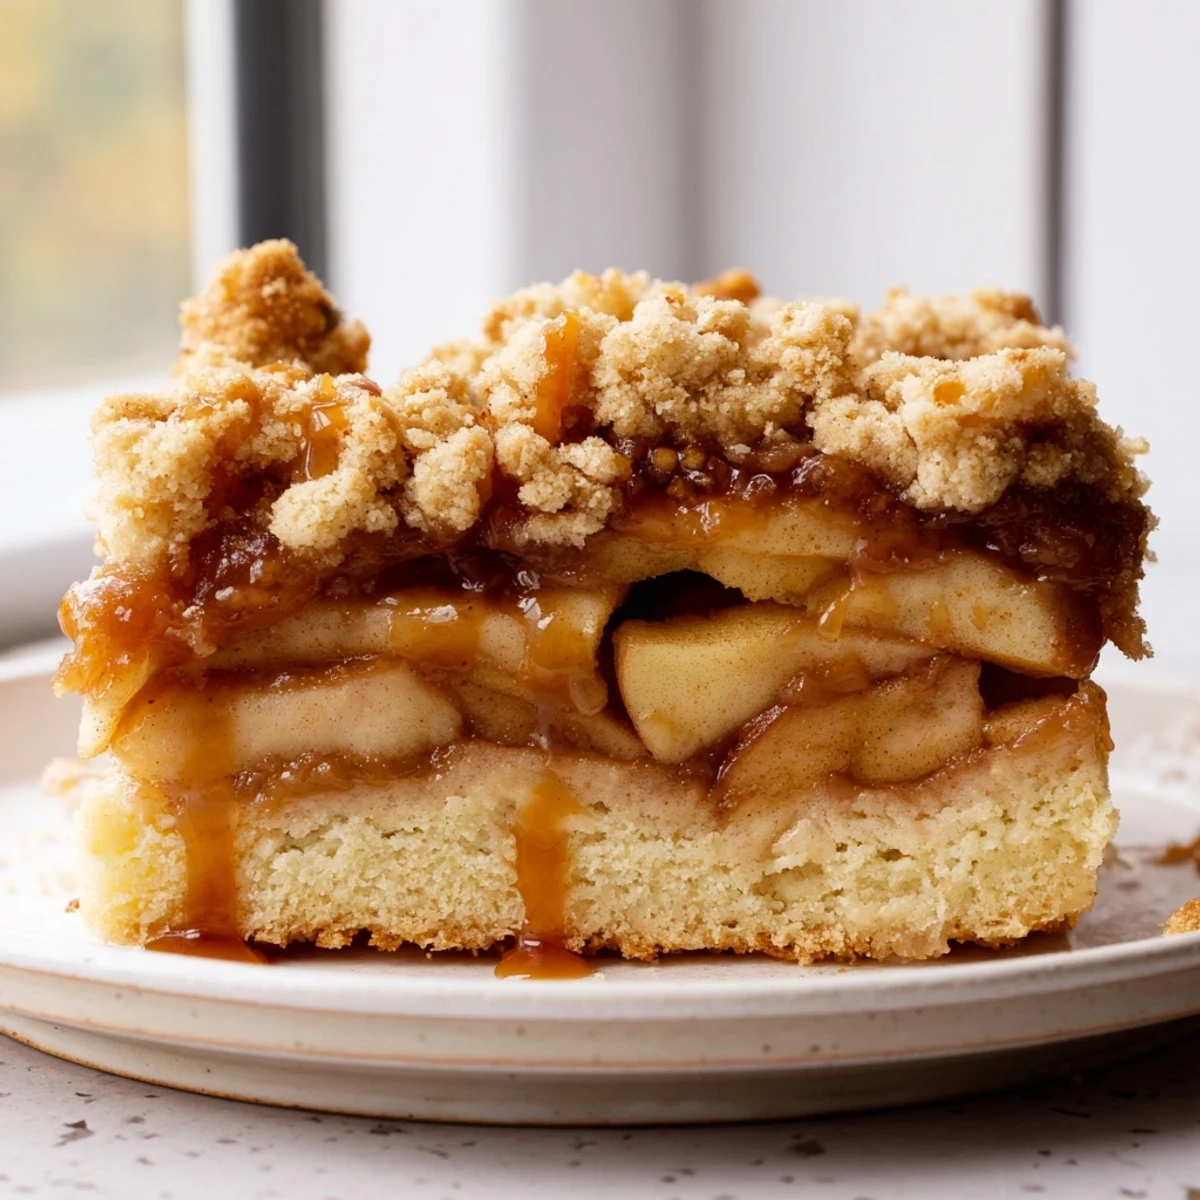
 These caramel apple crumb bars feature a tender, buttery shortbread base topped with thinly sliced apples tossed in cinnamon sugar, drizzled with rich caramel sauce, and finished with a golden crumb topping. The tart apples balance perfectly with the sweet caramel, while the buttery crust and crumble add satisfying texture. Bake until golden and let cool completely for clean slices.
The smell of cinnamon and caramel drifting from my oven still takes me back to that rainy Saturday when my neighbor dropped off a bag of windfall apples from her backyard tree. I had no plan for them, just a counter full of fruit and a craving for something warm and comforting. These bars emerged from happy experimentation, turning that unexpected gift into what became my most requested autumn treat.
Last Thanksgiving, my usually reserved brother-in-law actually went back for thirds and asked to take the remaining bars home. The kitchen had fallen quiet, everyone stuffed and content, when he wandered in from the living room and spotted the pan on the counter. Watching someone discover that perfect bite of tender apple, sweet caramel, and buttery crust through pure accident of timing is exactly why I keep making these year after year.
Ingredients
- 2 1/2 cups all-purpose flour: The foundation of both crust and crumb, creating that tender shortbread texture that holds everything together beautifully
- 1 cup unsalted butter, cold and cubed: Keeping this cold is the secret to a crumb that stays distinct and rather than melting into a solid layer
- 3/4 cup granulated sugar: Just enough sweetness to balance the tart apples without becoming cloying
- 1/2 teaspoon salt: This small amount makes all the difference in highlighting the butter flavor and keeping sweetness in check
- 1 teaspoon vanilla extract: Pure extract worth the extra cost, since vanilla carries all the other flavors
- 3 medium apples: I mix Honeycrisp and Granny Smith for that perfect sweet-tart balance and texture that holds up during baking
- 2 tablespoons lemon juice: Keeps the apples from browning and adds a bright note that cuts through the rich caramel
- 1/3 cup granulated sugar: Coating the apples draws out their natural juices and creates a silky fruit filling
- 1 tablespoon all-purpose flour: Just enough to thicken those apple juices so they do not make the crust soggy
- 1 teaspoon ground cinnamon: The warming spice that makes these taste unmistakably like fall
- 1/2 cup caramel sauce: Homemade caramel is divine, but a good quality store-bought sauce works perfectly here
Instructions
- Get your oven ready:
- Preheat to 350°F and line a 9x9-inch pan with parchment, letting those ends hang over like little handles that will save you later when lifting the whole thing out
- Make the base mixture:
- Whisk together flour, sugar, and salt in a large bowl, then work in that cold butter with your fingers until you see crumbles ranging from pea-sized to walnut-sized
- Stir in vanilla:
- Gently fold it through the crumbles, being careful not to overwork the mixture or your crust will be tough instead of tender
- Reserve some topping:
- Measure out about 1 1/2 cups of the crumble mixture and set it aside for later
- Press the crust:
- Firmly press the remaining dough into your prepared pan, using the flat bottom of a measuring cup to get it perfectly even
- Par-bake the crust:
- Bake for 12 minutes until just set and barely starting to color around the edges
- Prep the apples:
- While the crust bakes, toss those sliced apples with lemon juice, sugar, flour, and cinnamon until every piece is coated
- Layer the filling:
- Spread the apples over the hot crust, then drizzle that gorgeous caramel all over
- Add the crumb topping:
- Sprinkle the reserved mixture evenly across the top, leaving some larger crumbles for that irresistible texture
- Bake until golden:
- Bake for 28 to 32 minutes until the topping turns light golden brown and you can see the apples bubbling underneath
- Cool completely:
- This is the hard part, but letting them cool completely in the pan ensures clean cuts that hold their shape
 Pin it
 My daughter now requests these for every school bake sale, claiming they sell out faster than anything else. The first time she took them in, her teacher emailed asking for the recipe, and now they have become somewhat legendary among the third grade parents.
Making These Ahead
I have learned through plenty of last-minute situations that the crust and crumb mixture can be made up to two days ahead and stored in the refrigerator. The flour-sugar-butter blend actually benefits from that chilling time, producing an even more tender and distinct crumb texture after baking.
Choosing Your Apples
After testing countless combinations, I have found that mixing a crisp, sweet apple like Honeycrisp or Fuji with something tart like Granny Smith gives the best balance of flavor and texture. All-sweet apples can taste one-note, while all-tart might be too sharp for some palates.
Serving Suggestions
These bars need absolutely nothing to shine, but a scoop of vanilla ice cream while they are still slightly warm is pretty much divine. The cold cream melting into that warm caramel and spiced apple creates a moment worth savoring slowly.
- A pinch of flaky sea salt on top highlights the caramel beautifully
- Leftovers reheat surprisingly well in the microwave for 20 seconds
- Package them individually in wax paper for a thoughtful homemade gift
 Pin it
 There is something deeply satisfying about turning humble apples into something that makes people close their eyes and smile after that first bite. These bars have become my way of welcoming autumn, one buttery, caramel-drenched square at a time.
Recipe FAQs
- → What type of apples work best?
-
A mix of tart and sweet apples like Granny Smith, Honeycrisp, or Braeburn provides the best flavor balance and texture.
- → Can I use homemade caramel sauce?
-
Yes, homemade caramel sauce works beautifully. Ensure it's cooled slightly before drizzling to avoid melting the crust layer.
- → How do I know when the bars are done?
-
The crumb topping should be light golden brown and the apples tender when pierced with a fork. The center should be set, not jiggly.
- → Why must I cool completely before cutting?
-
Cooling allows the caramel and apple filling to set properly. Cutting while warm will cause the bars to crumble and lose shape.
- → Can I freeze these bars?
-
Yes, wrap individual bars tightly in plastic and freeze for up to 3 months. Thaw overnight in the refrigerator before serving.
